Introduction
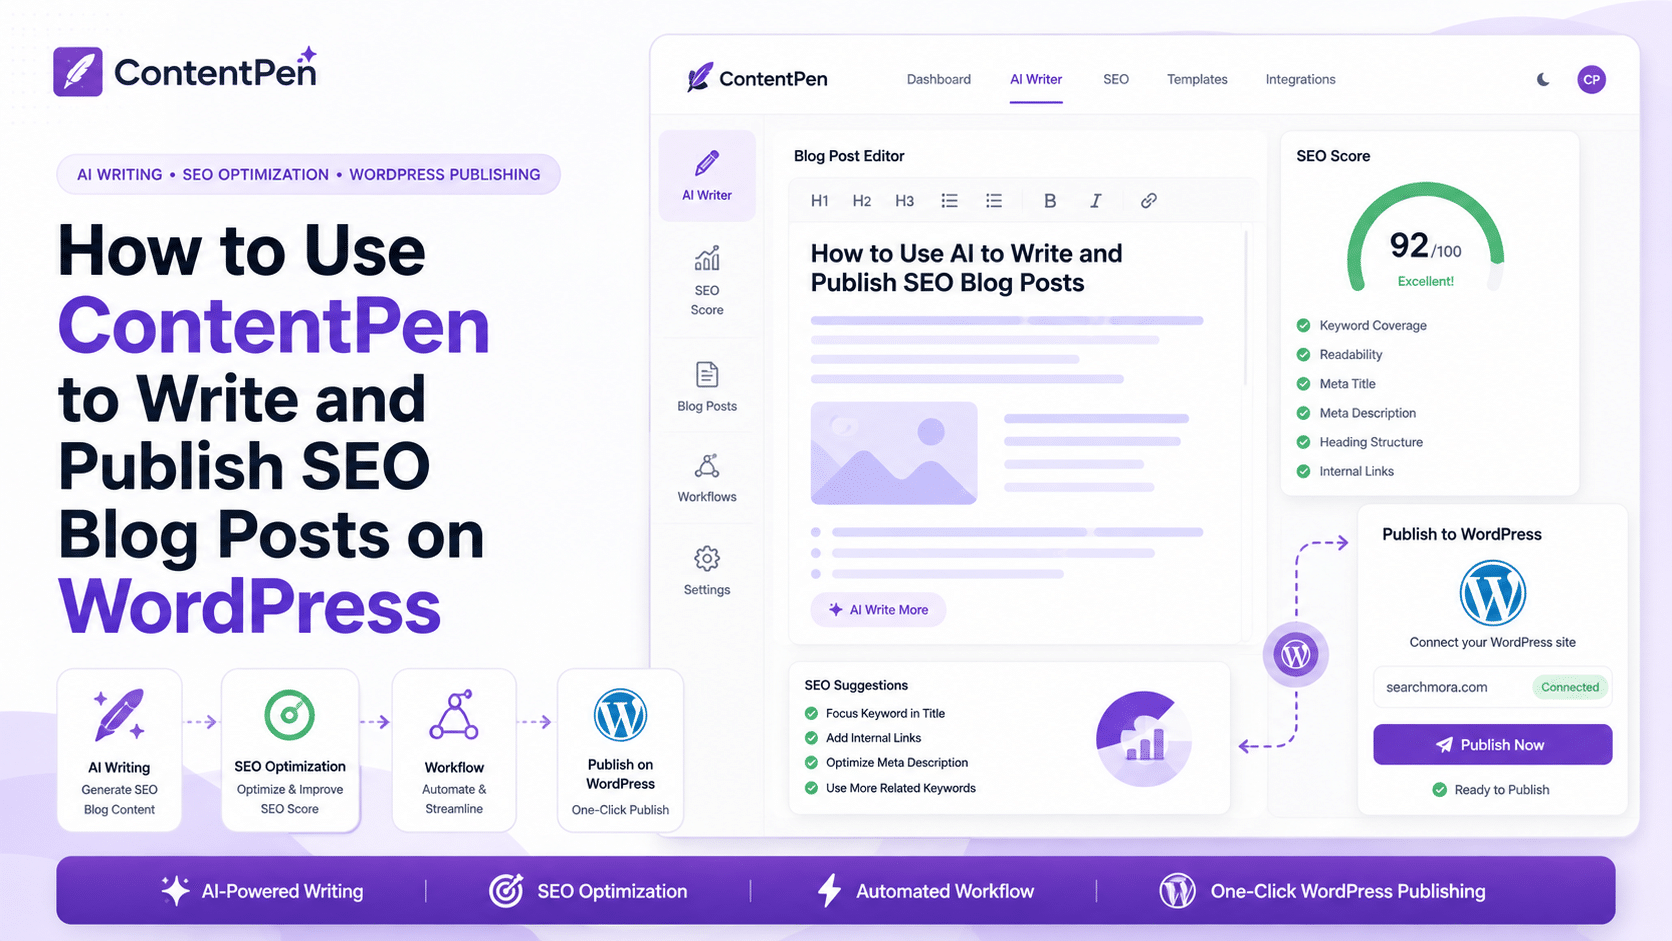
To use ContentPen with WordPress, connect your site safely, generate an SEO outline from SERP data, review H2 and H3 headings, create the article, enable internal linking from your sitemap, send the post as a WordPress draft, then add human edits before publishing.
ContentPen can help you move from keyword research to draft publishing faster.
However, the safest workflow is not:
keyword → AI article → auto-publish
The safer workflow is:
keyword → SERP analysis → outline review → draft generation → WordPress draft → human editing → publish
This matters because WordPress publishing affects:
- Page quality.
- metadata.
- categories.
- tags.
- images.
- internal links.
- affiliate links.
- schema.
- indexing.
- user trust.
ContentPen can produce a strong first draft.
But the final publish decision should stay with a human editor.
⚡ Quick Verdict
ContentPen is useful for writing and publishing SEO blog posts on WordPress when you use it as a controlled drafting and publishing workflow. Connect WordPress, review the outline, generate the article, check links and metadata, send it as a draft, then edit and enrich it before publishing.
| Workflow Step | Best Practice |
|---|---|
| WordPress connection | Use ContentPen’s official integration or secure API method |
| Publishing mode | Send articles as drafts, not live posts |
| Keyword input | Start with one clear primary keyword |
| SERP analysis | Review competitor structure before generation |
| H2 and H3 outline | Approve the structure before writing |
| Bulk generation | Use mainly for informational posts |
| Affiliate posts | Review manually before publishing |
| Internal links | Use sitemap-based suggestions, then edit anchors |
| External links | Keep only trusted and relevant sources |
| Images | Review AI images and add original media where possible |
| Metadata | Check title, meta description, categories, and tags |
| Final publish | Human editor should approve the post |
Best Workflow Summary
| Stage | ContentPen Role | Human Editor Role |
|---|---|---|
| Research | SERP analysis and topic structure | Confirm search intent |
| Outline | H2/H3 suggestions | Remove weak or generic headings |
| Draft | Generate SEO article | Fact-check and improve |
| Links | Suggest internal and external links | Review anchors and destinations |
| WordPress | Send content to CMS | Publish only after QA |
| Final quality | Provide first draft | Add original evidence and expertise |
The clearest takeaway is this: use ContentPen to speed up WordPress content production, but keep draft review, factual accuracy, links, and final publishing under human control.
Recommended Tools To Explore
📚 Recommended Reads
- ContentPen Review: Is This AI Blog Writer Worth It?
- ContentPen Pricing for Bloggers and Agencies: Which Plan?
- Is ContentPen Good for Affiliate Websites That Need SEO Content at Scale?
- Best AI Article Writing Tools Tested for SEO This Year
- How to Audit SEO Content with AI
📌 In This Guide
1. 🧠 What ContentPen Does for WordPress
2. 🔐 Connect ContentPen to WordPress Safely
3. ⚙️ API, Plugin, and Webhook Setup Basics
4. 📝 Use Draft Mode Instead of Auto-Publishing
5. 🔎 Start with Keyword and SERP Analysis
6. 🧱 Review the Outline Before Generation
7. ✍️ Generate the SEO Blog Post
8. 📦 Use Bulk Generation Carefully
9. 🔗 Enable Auto Internal Linking with Your Sitemap
10. 🌐 Review External Links and Sources
11. 🖼️ Add Images, Screenshots, and Infographics
12. 🧠 Add an Information Gain Layer
13. 🏷️ Check Meta Description, Categories, and Tags
14. ❓ Add FAQ and Schema Carefully
15. ✅ WordPress Pre-Publish Checklist
16. 📈 Monitor the Post After Publishing
17. ⚠️ Common Mistakes
18. ❓ FAQ
19. 🏁 Final Workflow
20. 📚 Recommended Next Reads
🧠 What ContentPen Does for WordPress
ContentPen helps WordPress users generate SEO-ready blog drafts, structure articles from SERP research, add internal and external links, include images, and publish content directly to a connected CMS.
For WordPress publishers, the main benefit is workflow speed.
Instead of writing every article from a blank page, ContentPen can help with:
- Keyword-based article creation.
- SERP analysis.
- outline generation.
- H2 and H3 suggestions.
- AI article drafting.
- AI image generation.
- internal link suggestions.
- external links.
- meta information.
- CMS publishing.
This is useful for:
- bloggers
- affiliate sites
- SEO agencies
- niche site owners
- small businesses
- content teams
- local SEO publishers
- SaaS blogs
But speed should not replace judgment.
The best WordPress posts still need a human editor.
🔐 Connect ContentPen to WordPress Safely
Connect ContentPen to WordPress using the official ContentPen WordPress workflow or a secure API method. The goal is to let ContentPen send completed articles to WordPress without giving unnecessary access or publishing unreviewed content.
Safe Connection Principles
Before connecting any AI publishing tool to WordPress, follow these rules:
- Use the least permission needed.
- Avoid sharing your main admin password.
- Use a dedicated WordPress user when possible.
- Keep plugins updated.
- Test with one draft first.
- Do not publish directly on the first connection.
- Review how images and metadata are transferred.
- Confirm that categories and tags are assigned correctly.
- Check whether generated posts remain editable.
- Disconnect access if you stop using the tool.
Recommended User Role
For safety, create a dedicated WordPress user for ContentPen publishing.
Use a role that can create and edit posts but does not need full site control.
For many sites, this may mean an Editor-level or custom limited role, depending on your setup.
Avoid using the main site administrator account unless required.
Why Draft Publishing Matters
A direct CMS connection is powerful.
It can save time, but it can also push mistakes into WordPress quickly.
Draft mode gives you time to review:
- headings
- facts
- images
- links
- categories
- tags
- meta description
- affiliate disclosures
- internal link anchors
- formatting
Treat the integration as a publishing assistant, not a final editor.
⚙️ API, Plugin, and Webhook Setup Basics
ContentPen can connect with WordPress through its publishing integration, and modern WordPress workflows may use plugin-based access, API keys, application passwords, REST API access, or webhook-style publishing depending on the setup.
Option 1: ContentPen WordPress Integration
The simplest route is to use ContentPen’s WordPress integration.
A typical setup looks like this:
- Open ContentPen integration settings.
- Choose WordPress.
- Add the WordPress site connection.
- Copy or generate the required key or credentials.
- Authorize the connection.
- Test with a draft article.
- Confirm that the post appears correctly in WordPress.
Option 2: WordPress Plugin
A plugin-based workflow can make integration easier because the plugin acts as the bridge between ContentPen and WordPress.
Before using any plugin, check:
- Plugin source.
- latest update date.
- compatibility with your WordPress version.
- user permissions.
- reviews or install base.
- whether it adds database load.
- whether it stores external credentials.
- whether it conflicts with SEO plugins.
Option 3: Application Passwords and REST API
WordPress application passwords can be used for external applications that need authenticated access through the REST API.
If this method is used:
- Create a dedicated WordPress user.
- Generate an application password for that user.
- Store the password securely.
- Use HTTPS only.
- Limit permissions through the user role.
- Revoke the password if access is no longer needed.
This approach is more technical than a simple plugin connection.
It should be handled carefully, especially on client websites.
Option 4: Webhook Publishing
Webhook-style workflows are useful when a system sends content or events from one platform to another.
For ContentPen and WordPress, this type of setup can be useful for custom workflows, but most bloggers should start with the official CMS connection before building anything custom.
Avoid Database Slowdowns
A publishing integration should not constantly scan the full WordPress database during normal page loads.
To reduce risk:
- Use official integrations.
- avoid heavy custom plugins.
- avoid scripts that scan all posts on every request.
- use sitemap-based linking instead of live database scanning.
- test on staging when possible.
- monitor server performance after connection.
- disable unused publishing tools.
📝 Use Draft Mode Instead of Auto-Publishing
Send ContentPen articles to WordPress as drafts whenever possible. Draft mode allows the editor to review facts, images, headings, links, metadata, categories, tags, and formatting before the post becomes visible to readers or search engines.
Why Draft Mode Is Safer
Draft mode protects the site from:
- inaccurate claims.
- weak headings.
- irrelevant internal links.
- poor anchor text.
- incorrect external sources.
- missing affiliate disclosures.
- wrong categories.
- duplicate tags.
- generic AI images.
- unedited AI tone.
Draft Mode Workflow
Use this workflow:
- Generate the article in ContentPen.
- Review the outline.
- Review internal and external links.
- Add images or placeholders.
- Send the article to WordPress as a draft.
- Open the draft in WordPress.
- Review formatting.
- Update metadata.
- Add original media.
- Preview the page.
- Publish manually.
When Auto-Publishing May Be Acceptable
Auto-publishing may be acceptable only for low-risk, heavily templated content after a tested workflow is stable.
Even then, avoid auto-publishing:
- affiliate reviews
- product comparisons
- medical content
- financial content
- legal content
- pricing pages
- brand reputation pages
- anything requiring expert review
For most SEO blogs, draft publishing is the better default.
🔎 Start with Keyword and SERP Analysis
Start every ContentPen article with one clear primary keyword, then review the SERP analysis before generating the full post. This helps the article match search intent instead of becoming a generic AI draft.
What to Check in SERP Analysis
Before writing, review:
- ranking page types.
- search intent.
- common H2 headings.
- People Also Ask questions.
- competitor structure.
- content length range.
- important entities.
- missing topic gaps.
- commercial vs informational balance.
- required tables or examples.
Good Keyword Input
A weak input is:
AI SEO
A stronger input is:
how to use AI for SEO content audits
The stronger keyword gives ContentPen a clearer intent.
Match the Content Type
| Keyword Type | Best Content Type |
|---|---|
| What is ContentPen? | Definition / explainer |
| How to use ContentPen | Tutorial |
| ContentPen pricing | Pricing guide |
| ContentPen vs KoalaWriter | Comparison |
| Best AI blog writers | Listicle |
| ContentPen review | Review |
| ContentPen alternatives | Alternatives article |
Do not force every keyword into the same template.
🧱 Review the Outline Before Generation
Review the H2 and H3 outline before generating the article. This is the most important quality-control step because a weak outline creates a weak article even if the writing looks polished.
What a Good Outline Should Include
A strong SEO outline should have:
- One clear H1.
- H2s for major search-intent questions.
- H3s that support the H2 above them.
- no random heading jumps.
- no repeated sections.
- specific entity-based headings.
- direct-answer sections.
- comparison tables where helpful.
- FAQ questions.
- a final verdict or workflow.
What to Remove
Remove headings that are:
- vague
- repetitive
- off-topic
- too broad
- keyword-stuffed
- copied from competitors without improvement
- not useful to the reader
- too promotional
NLP Entity Review
Check whether the outline covers important entities naturally.
For an article about ContentPen and WordPress, useful entities may include:
- WordPress.
- REST API.
- Application Passwords.
- draft post.
- sitemap.
- internal links.
- meta description.
- categories.
- tags.
- schema.
- AI images.
- SERP analysis.
- ContentPen.
- CMS publishing.
- AEO.
Do not add entities only for SEO.
Add them when they make the article clearer.
✍️ Generate the SEO Blog Post
After the outline is approved, generate the article and review the first draft for accuracy, structure, tone, links, and usefulness. ContentPen should create a publish-ready draft, but it still needs editorial review before going live.
What to Review in the Draft
Check:
- Does the first paragraph answer the query?
- Are H2s and H3s logical?
- Does every section match its heading?
- Are facts current?
- Are sources credible?
- Are links relevant?
- Are examples specific?
- Is the tone natural?
- Are there repeated phrases?
- Is the article useful without fluff?
AEO Block Rule
For important sections, use this structure:
- Clear heading.
- direct answer in 40–50 words.
- supporting details.
- examples.
- table or checklist where useful.
This makes the article easier for readers and AI systems to understand.
Avoid One-Click Thinking
One-click article generation is useful for creating a first draft.
It is not a complete editorial process.
For professional SEO content, the draft still needs:
- strategy
- proof
- internal links
- original examples
- fact-checking
- final formatting
- human judgment
📦 Use Bulk Generation Carefully
Use ContentPen bulk generation mainly for informational articles, not high-value affiliate reviews, product comparisons, or commercial pages that require testing, original evidence, and strong editorial judgment.
Good Bulk Generation Use Cases
Bulk generation works best for:
- how-to articles.
- what-is articles.
- glossary posts.
- beginner guides.
- topic cluster support pages.
- long-tail informational keywords.
- FAQ-style articles.
- simple educational posts.
- content hub support pages.
- low-risk content refreshes.
Avoid Bulk Auto-Publishing For
Do not bulk auto-publish:
- product reviews.
- best tools articles.
- affiliate comparisons.
- medical advice.
- financial advice.
- legal content.
- pricing pages.
- software recommendations.
- high-conversion landing pages.
- pages with sensitive claims.
Bulk Workflow
Use this workflow:
- Prepare keyword list.
- group by topic silo.
- generate outlines first.
- approve outline structure.
- generate drafts.
- send to WordPress as drafts.
- review one batch at a time.
- publish gradually.
- monitor indexing and performance.
Publishing 50 weak posts quickly is not a content strategy.
Publishing 50 reviewed support articles inside a clear topic silo can be.
🔗 Enable Auto Internal Linking with Your Sitemap
ContentPen can use your WordPress sitemap to understand existing content and suggest internal links. This is useful for topic clusters, but anchors and target URLs should be reviewed before publishing.
How to Prepare the Sitemap
Most WordPress SEO plugins generate XML sitemaps.
Common sitemap locations include:
- the main sitemap index
- post sitemap
- page sitemap
- category sitemap
Inside ContentPen, add the sitemap so the tool can map relevant pages and suggest contextual links.
What to Review
Before publishing, check:
- Anchor text.
- destination URL.
- link relevance.
- topic silo alignment.
- number of internal links.
- whether pillar pages receive support.
- whether old weak pages are promoted.
- whether money pages are overlinked.
- whether the same anchor repeats too often.
- whether links help the reader.
Good Internal Link Example
If the article is about AI content audits, good internal links may point to:
- Best AI Tools Tested for Content Audits
- How to Audit SEO Content with AI
- Best AI Internal Linking Tools
- How to Build Internal Links with AI
Bad internal links may point to unrelated topics just because they share one word.
Pillar Page Strategy
Use links to support pillar pages.
A simple structure:
| Page Type | Link Direction |
|---|---|
| Supporting article | Links to pillar page |
| Pillar page | Links to key supporting articles |
| Review page | Links to comparison and alternatives |
| Comparison page | Links to reviews and buying guides |
| Glossary page | Links to deeper tutorials |
The goal is not to add the most links.
The goal is to add the most useful links.
🌐 Review External Links and Sources
External links should support factual claims, not send readers to random pages or direct competitors without purpose. Review every external link before publishing a ContentPen draft.
Good External Links
Use external links for:
- official product pages.
- technical documentation.
- primary sources.
- research reports.
- government or academic sources.
- reputable industry studies.
- official pricing pages.
- official integration guides.
External Link Risks
Watch for:
- links to competitors.
- outdated sources.
- weak blogs.
- unrelated pages.
- broken links.
- irrelevant statistics.
- vendor claims without context.
- pages that contradict your article.
For Affiliate Sites
Replace generic product links with your correct affiliate links where appropriate.
Also check:
- affiliate tracking parameters.
- disclosure placement.
- sponsored or nofollow attributes where appropriate.
- product destination accuracy.
- country-specific landing pages.
Do not let an AI tool choose commercial links without review.
🖼️ Add Images, Screenshots, and Infographics
ContentPen can help with images, but WordPress posts perform better when you add original screenshots, product visuals, charts, or infographics that prove real experience.
Image Review Checklist
Check:
- Does the image match the section?
- Is it original or AI-generated?
- Is the alt text accurate?
- Is the file compressed?
- Is the image uploaded correctly to WordPress?
- Does it have a useful filename?
- Is the featured image appropriate?
- Does it support the article’s claim?
- Does it slow the page?
- Does it add information or decoration?
Original Media Ideas
Add:
- Screenshots from your WordPress dashboard.
- ContentPen workflow screenshots.
- before-and-after outline examples.
- internal link map diagrams.
- content publishing checklist graphics.
- comparison tables.
- small process infographics.
- annotated SERP examples.
Original media helps the article feel tested and useful.
🧠 Add an Information Gain Layer
Before publishing, add information the AI draft could not create on its own. This includes real screenshots, practical lessons, original examples, custom tables, editorial opinions, and mistakes found during the workflow.
What to Add Before Publishing
Add:
- A real screenshot of the ContentPen-to-WordPress draft.
- A screenshot of the outline review step.
- An example sitemap connection.
- A before-and-after heading table.
- A checklist from your editing process.
- A real internal link review example.
- A short note about what the tool got wrong.
- Your publishing recommendation.
- A custom FAQ section.
- A final human verdict.
Weak vs Strong Section
Weak:
ContentPen helps you publish articles faster on WordPress.
Stronger:
In practice, the safest setup is to send articles as drafts, because the tool can transfer structure and links quickly, but the editor still needs to check anchors, images, categories, and the first paragraph before publishing.
The stronger version adds judgment.
Information Gain Rule
Do not ask AI to invent:
- screenshots.
- test results.
- personal experience.
- client examples.
- traffic gains.
- ranking improvements.
- revenue results.
- false publishing outcomes.
Use placeholders where real evidence must be added.
Example:
Add screenshot of WordPress draft preview here.
🏷️ Check Meta Description, Categories, and Tags
Before publishing in WordPress, review the meta description, categories, tags, slug, and featured image. AI-generated metadata can be useful, but it may not match your site structure or SEO plugin settings.
Metadata Checklist
Check:
- Title tag.
- H1.
- slug.
- meta description.
- focus keyword.
- categories.
- tags.
- featured image.
- image alt text.
- excerpt.
- canonical URL.
- social preview.
Category and Tag Rules
Use categories for broad site structure.
Use tags for specific topics.
Avoid creating too many near-duplicate tags such as:
- AI SEO
- AI SEO Tools
- SEO AI Tools
- AI Tools SEO
A messy tag system can create thin archives and poor navigation.
Meta Description Rule
The meta description should:
- Summarize the page clearly.
- include the main topic naturally.
- avoid clickbait.
- fit the user intent.
- stay concise.
Do not accept metadata automatically without reading it.
❓ Add FAQ and Schema Carefully
FAQ sections can improve clarity when they answer real user questions. Add FAQ only when the questions are visible on the page and genuinely useful to readers.
Good FAQ Questions
For this article, good FAQ questions include:
- How do I connect ContentPen to WordPress?
- Can ContentPen publish WordPress drafts?
- Should I auto-publish AI articles?
- Does ContentPen support internal linking?
- Can ContentPen add images to WordPress?
- Is ContentPen safe for affiliate posts?
- Should I use bulk generation?
- How do I review AI-generated links?
Schema Warning
Only use FAQ schema when:
- The FAQ content is visible.
- The questions match the page.
- The answers are accurate.
- Your SEO plugin supports it correctly.
- The markup follows current search guidelines.
Schema does not guarantee rich results or AI citations.
It helps machines understand content structure.
✅ WordPress Pre-Publish Checklist
Before publishing a ContentPen draft in WordPress, review the content, formatting, links, images, metadata, schema, category, tags, and original value layer.
Final Checklist
| Check | What to Confirm |
|---|---|
| H1 | Clear and matches the page topic |
| First 50 words | Direct answer to the main query |
| H2/H3 structure | Logical and easy to scan |
| Facts | Accurate and current |
| Internal links | Relevant and silo-aligned |
| External links | Trusted and useful |
| Images | Compressed, relevant, and properly named |
| Alt text | Descriptive and natural |
| Metadata | Accurate and not duplicated |
| Category | Correct primary category |
| Tags | Useful and not excessive |
| Affiliate links | Correct and disclosed |
| Schema | Appropriate and valid |
| Formatting | Mobile-friendly |
| Original value | Screenshots, examples, or custom tables added |
| Preview | Checked before publishing |
Publish Only When
Publish when the article:
- Answers the query quickly.
- provides useful detail.
- has accurate links.
- includes human review.
- supports your topic cluster.
- meets your quality standards.
📈 Monitor the Post After Publishing
After publishing, monitor indexing, impressions, clicks, CTR, rankings, engagement, internal links, and conversions. A ContentPen article should be treated as the start of a content cycle, not the end.
What to Track
Track:
- Indexing status.
- impressions.
- clicks.
- CTR.
- ranking queries.
- engagement time.
- affiliate clicks.
- leads.
- internal link clicks.
- AI visibility if available.
When to Refresh
Refresh when:
- CTR declines.
- rankings drop.
- product facts change.
- screenshots become outdated.
- SERP intent shifts.
- competitors improve.
- internal links become broken.
- the page gets impressions but no clicks.
Keep an Edit Log
Record:
- publish date.
- keyword.
- article type.
- AI tool used.
- editor.
- changes made.
- internal links added.
- screenshots added.
- update date.
- performance notes.
This helps you know what actually worked.
⚠️ Common Mistakes
The biggest ContentPen WordPress mistake is publishing AI drafts directly without reviewing structure, links, metadata, and original value. The second biggest mistake is using bulk generation for commercial pages that need human testing.
Mistake 1: Publishing Without Draft Review
Always review drafts inside WordPress.
Mistake 2: Ignoring the Outline
A bad outline creates a weak article.
Mistake 3: Overusing Bulk Generation
Bulk generation is best for informational content, not review pages.
Mistake 4: Trusting Every Internal Link
Review anchors and destinations.
Mistake 5: Adding Too Many Tags
Too many tags create messy WordPress archives.
Mistake 6: Using Generic Images
Add original screenshots where possible.
Mistake 7: Forgetting Affiliate Disclosure
Affiliate content needs transparency.
Mistake 8: Auto-Publishing Money Pages
High-value commercial content needs human approval.
Mistake 9: Not Checking Metadata
AI-generated titles and descriptions still need review.
Mistake 10: Skipping Post-Publish Monitoring
SEO content needs updates after publishing.
❓ FAQ
1. How do I use ContentPen with WordPress?
Connect WordPress to ContentPen, create an article from a keyword, review the SERP-based outline, generate the draft, enable internal linking, then send the post to WordPress as a draft for final editing.
2. Can ContentPen publish directly to WordPress?
Yes. ContentPen supports direct publishing to connected CMS platforms, including WordPress. For safety, send posts as drafts first and publish manually after review.
3. Should I auto-publish ContentPen articles?
Usually no. Draft publishing is safer because it allows a human editor to check facts, links, images, metadata, categories, and formatting before the post goes live.
4. Does ContentPen support internal linking?
Yes. ContentPen can use your sitemap to find relevant internal linking opportunities and place contextual links inside generated content.
5. How do I add my sitemap to ContentPen?
Add your WordPress XML sitemap inside ContentPen’s sitemap or linking settings so the tool can map existing pages and suggest relevant internal links.
6. Can ContentPen add images to WordPress posts?
ContentPen can generate and transfer media through publishing workflows, but you should review every image, filename, alt text, and placement before publishing.
7. Is ContentPen good for affiliate blogs on WordPress?
Yes, especially for informational content, topic clusters, and content refreshes. Use more human review for product reviews, comparisons, and money pages.
8. Can I use ContentPen for bulk WordPress publishing?
Yes, but use bulk generation carefully. It is better for informational articles than commercial pages. Send articles to WordPress as drafts and publish in reviewed batches.
9. Does ContentPen handle WordPress categories and tags?
ContentPen can support CMS publishing workflows, but you should review categories, tags, slugs, and metadata inside WordPress before publishing.
10. What should I check before publishing?
Check the first paragraph, H2/H3 structure, facts, images, links, metadata, categories, tags, schema, affiliate disclosure, and original screenshots or examples.
11. Can ContentPen slow down WordPress?
A normal publishing integration should not slow down WordPress by itself, but poorly built plugins, heavy scans, or custom scripts can add load. Use official integrations and monitor performance.
12. Is ContentPen enough to create SEO content?
ContentPen can create strong drafts, but SEO content still needs human editing, fact-checking, original examples, internal link review, and post-publish monitoring.
🏁 Final Workflow
The safest way to use ContentPen for WordPress is to treat it as an AI content production assistant, not an auto-publishing machine.
Use this workflow:
- Choose one clear keyword.
- Confirm the search intent.
- Run ContentPen SERP analysis.
- Review competitor structure.
- Approve the H2 and H3 outline.
- Check important NLP entities.
- Generate the article.
- Review the first 50 words.
- Enable sitemap-based internal linking.
- Review anchor text and destinations.
- Check external links.
- Add or review images.
- Send the article to WordPress as a draft.
- Review the WordPress draft.
- Add original screenshots or infographics.
- Improve tables and FAQs.
- Check metadata, categories, and tags.
- Preview on mobile.
- Publish manually.
- Monitor Search Console and GA4.
For informational posts, ContentPen can handle much of the first draft workflow.
For affiliate reviews, comparisons, and money pages, ContentPen should only create the structure and draft. The final article needs real product knowledge, original media, and human judgment.
The clearest takeaway is this: ContentPen can help you write and publish SEO blog posts on WordPress faster, but the best results come when every post goes through draft mode, link review, information gain, and human approval before publishing.

Comments 4